Tools & Ingredients
Fermentation Equipment Every Beginner Needs
A practical guide to fermentation equipment for beginners: what's essential, what helps, and what you can improvise from things already in your kitchen.
You can start fermenting with a mason jar, a kitchen scale, and a box of non-iodized salt. That's it. Everything else on this page either makes the process easier or becomes relevant once you're hooked. Here's a clear-eyed breakdown of what actually matters, what can wait, and what you can fake with stuff already in your kitchen.
The Essentials You'll Use Every Single Time
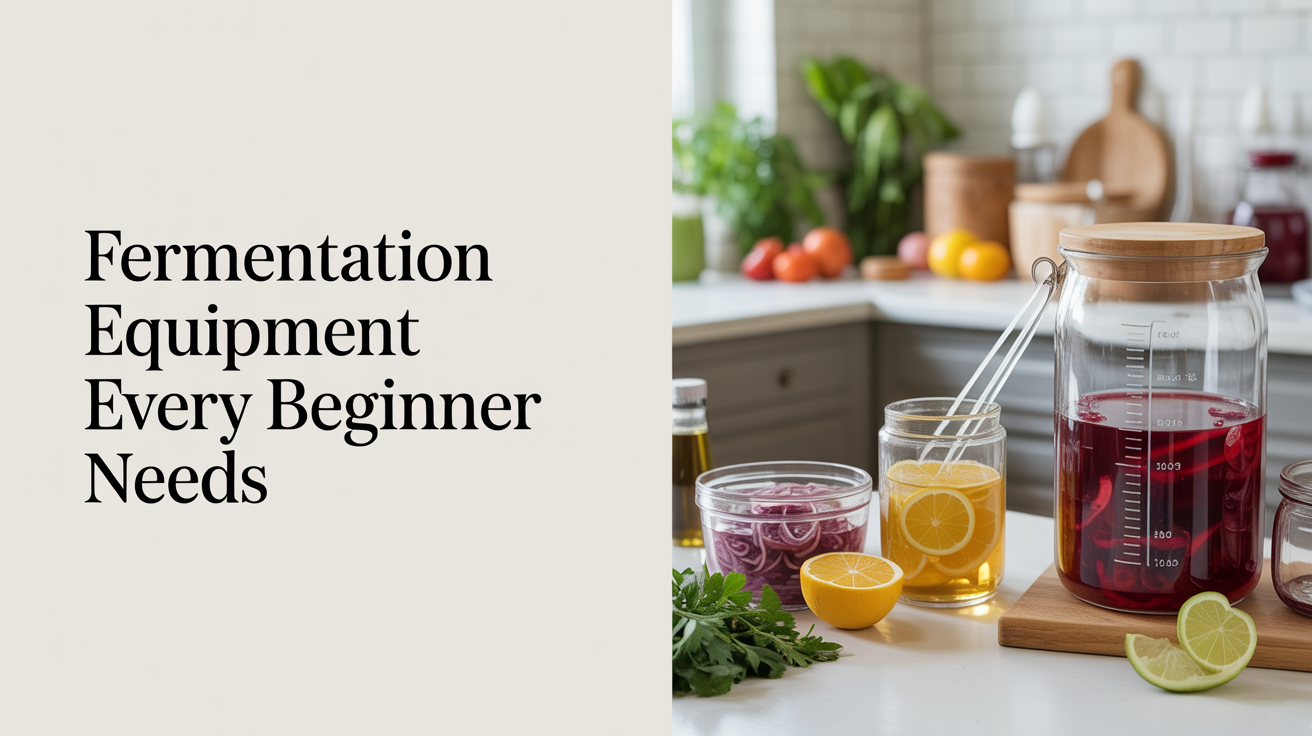
Wide-Mouth Glass Jars
Wide-mouth mason jars (quart and half-gallon sizes) are the workhorse of home fermentation. The wide opening makes packing vegetables easy, lets you reach in to check things, and fits standard fermentation lids if you want them later. Regular-mouth jars work in a pinch, but packing a narrow neck with cabbage is a frustrating experience.
Ball, Kerr, and Weck are common brands, but store-brand and off-brand jars work just as well for fermentation (unlike canning, you're not pressure-processing, so sealing precision isn't critical). Buy a set of quart jars as your first purchase. Half-gallons are useful for larger batches and for kombucha.
A Kitchen Scale
Volume measurements are notoriously unreliable for salt. A teaspoon of fine sea salt contains far more sodium than a teaspoon of Diamond Crystal kosher salt, because the crystals are different sizes. If you use volume, you're guessing.
A scale removes the guesswork. Most beginner fermentation recipes express salt as a percentage of total vegetable weight (typically 2–2.5% for sauerkraut and kimchi-style ferments). A scale makes that calculation a two-second job. Any digital kitchen scale accurate to 1 gram works. You don't need anything expensive.
Non-Iodized Salt
This one is a supply item, not equipment, but it belongs here because iodized table salt is one of the most common reasons beginner ferments fail. Iodine is added to table salt to prevent iodine deficiency, but it also inhibits the lactobacillus bacteria you're trying to cultivate.
Use kosher salt, sea salt, or pickling salt. Check the label: if it says "iodized," skip it. Choosing the right salt matters more than most beginners expect, it affects both the microbial environment and the final flavor.
Something to Keep Vegetables Submerged
Keeping vegetables below the brine line is the single most important food-safety practice in lacto-fermentation. Anything exposed to air can grow mold. Most beginners skip weights entirely, then wonder why they got surface mold on day three.
You don't need to buy anything for this. A small zip-lock bag filled with brine (not plain water, in case it leaks) works well. A smaller jar filled with water and set inside the ferment jar also works. Zip-lock brine bags conform to the jar's shape and push everything down evenly. Once you've done a few batches and want a more reliable solution, dedicated glass or ceramic weights are worth buying.
A Way to Cover the Jar
For most vegetable ferments, you have two reasonable options: a cloth cover secured with a rubber band (good for kombucha and anything where you want airflow), or a regular lid set loosely on top and "burped" daily by briefly opening it to release CO2 buildup.
Airlocks are genuinely useful but not required. A standard mason jar lid screwed on loosely does the job for a beginner's first few batches. If you forget to burp it and it builds too much pressure, the lid will pop off before anything dangerous happens.
What Comes Next: Supplies That Make Life Easier
Fermentation Weights
Glass fermentation weights designed to fit wide-mouth mason jars are a small upgrade that removes a regular chore. They sit inside the jar, hold everything submerged without improvising, and are easy to clean. Some people prefer ceramic weights or small glass discs.
Worth buying once you're making ferments regularly. Not worth buying before you've made your first batch.
Airlock Lids
An airlock lid replaces a standard mason jar lid and allows CO2 to escape without letting air in. This means you never have to remember to burp the jar, and you get a more anaerobic environment from day one. Some beginner kits include these.
There are a few styles: two-piece water airlocks (the kind used in homebrewing) seated in a rubber grommet drilled through a standard lid, or purpose-built fermentation lids with built-in valves. Both work. The tradeoffs between weights and airlocks are worth understanding before you buy, sometimes the simpler option is better.
A Crock
Traditional ceramic crocks with water-seal channels (the moat around the rim holds water, creating a natural airlock) are excellent for larger batches and look good on a counter. They're also expensive and bulky. A two-liter crock costs more than a full set of mason jars and holds about as much as one half-gallon jar.
Crocks have real advantages for long ferments and large batches, but most beginners don't need one until they know they'll be making fermenting a regular practice.
pH Strips or a Meter
Measuring pH isn't necessary for standard vegetable ferments, which become safe through the production of lactic acid that acidifies the brine to roughly pH 3–4. But if you're troubleshooting a failed batch, or fermenting proteins (meat, fish), a pH meter gives you real data instead of guesswork. A basic pH meter in the $15–25 range is adequate. Paper pH strips work too, though they're less precise.
Cloth Covers
Kombucha and water kefir both need airflow during fermentation, not a sealed environment. A tight-weave cotton cloth (a flour sack towel works well) or paper coffee filters secured with a rubber band keep fruit flies out while letting the culture breathe. Don't skip this for kombucha, fruit flies love the sweet tea and will lay eggs in an uncovered vessel.
What You Can Improvise
A lot of fermentation equipment is just a container, a weight, and a cover. Here's what actually works:
- Weight substitute: Fill a small zip-lock bag with 2% brine and press it into the jar opening. It fills the gap, weighs down the vegetables, and won't dilute your brine if it leaks.
- Airlock substitute: A standard mason jar lid screwed on loosely. Open briefly once a day to release gas. This works fine for ferments under two weeks.
- Crock substitute: A half-gallon mason jar. It handles 2–3 pounds of vegetables with room to spare.
- Tamper/pounder substitute: The end of a French rolling pin, a muddler, or your fist covered in a zip-lock bag. The goal is just to bruise the vegetables and push them down.
Equipment at a Glance
| Item | What It Does | Essential or Later | Cheap Substitute |
|---|---|---|---|
| Wide-mouth quart jars | Fermentation vessel | Essential | Any clean glass jar with a lid |
| Kitchen scale | Accurate salt measurement | Essential | Skip at your peril; volume is unreliable |
| Non-iodized salt | Feeds lactobacillus, inhibits pathogens | Essential | Any non-iodized salt works |
| Fermentation weights | Keeps vegetables submerged | Later (helpful) | Zip-lock bag filled with brine |
| Airlock lid | Releases CO2 without letting air in | Later (helpful) | Loose-fitting regular lid, burped daily |
| Cloth cover | Airflow for kombucha/kefir | Essential for kombucha | Tight-weave cotton or coffee filter |
| Ceramic crock | Large-batch fermentation | Later (optional) | Half-gallon mason jar |
| pH strips or meter | Troubleshooting and safety check | Later (optional) | Not easily improvised; buy if needed |
| Tamper/pounder | Packing and bruising vegetables | Nice to have | Rolling pin end, muddler, clean fist |
Food Safety Basics You Should Know Before You Start
Lacto-fermentation is one of the oldest and safest food preservation methods. The lactic acid produced by naturally occurring bacteria drops the pH quickly enough to prevent pathogen growth. But a few practices matter:
Keep vegetables submerged. Surface mold (usually white and fuzzy, or occasionally pink) happens when vegetables float above the brine. It's not necessarily dangerous, but it's a sign of an aerobic environment. Skim it off, push everything back down, and use a weight going forward. If it's throughout the jar or looks black or green and fuzzy, discard the batch.
Use clean equipment, not sterile. You don't need to sterilize jars for lacto-fermentation the way you do for canning. Wash jars in hot soapy water and rinse well. Residual soap can inhibit fermentation.
Trust your senses. A good ferment smells sour and tangy. It might smell a bit funky (that's fine for kimchi). If it smells putrid, rotten, or like nail polish remover, don't eat it.
Temperature matters. Most vegetable ferments work best between 65–75°F (18–24°C). Warmer speeds fermentation but can produce softer textures and stronger flavors. Cooler slows things down. A ferment left in an 85°F kitchen in August will be done in two days but may be quite sour and soft. Adjust timing to your environment, not the other way around.
Frequently Asked Questions
Do I need a special fermentation lid, or will a regular mason jar lid work?
A regular mason jar lid works for most beginner ferments. The key is to not seal it completely, leave it just loose enough that CO2 from active fermentation can escape, or open it briefly once a day (called "burping"). Fermentation lids with built-in valves make this automatic and are worth buying once you're fermenting regularly, but they're not required to get started.
Can I ferment in plastic containers?
It's not ideal. Plastic can harbor bacteria from previous uses and may absorb flavors. Acidic ferments can also leach compounds from some plastics over time. Glass is cheap and widely available, start with glass jars and don't complicate it.
Why does my ferment have white stuff on top?
White, flat, film-like growth on the brine surface is usually kahm yeast, a harmless (if off-tasting) film that forms when the surface is exposed to air. Skim it off and get a weight in there. White fuzzy mold higher up on the jar or on a floating vegetable is more concerning, remove the mold and whatever it touched, check that the rest of the vegetables are fully submerged, and monitor closely. If mold is throughout the jar or is any color other than white, discard the batch.
How much salt should I use for a basic vegetable ferment?
2–2.5% salt by weight of vegetables is the standard starting range for most lacto-fermented vegetables. For every 1000 grams of vegetables, use 20–25 grams of non-iodized salt. This range inhibits harmful bacteria while letting lactobacillus thrive. Going below 1.5% risks a mushy, potentially unsafe ferment. Going above 3% slows fermentation noticeably and can result in an overly salty final product.
How long until my ferment is ready?
Most basic vegetable ferments are ready in 3–7 days at room temperature (65–75°F). Sauerkraut is often left for 2–4 weeks for a fuller flavor. The right time is when it tastes the way you want it to taste, try it starting at day three and decide for yourself. Fermentation doesn't have a hard finish line.