Fermented Vegetables
How to Keep Vegetables Submerged While Fermenting
How to keep vegetables under the brine so mold and kahm yeast never take hold, with beginner methods, DIY options, and food-safety tips.
The single most important rule in vegetable fermentation is this: keep every piece of food below the brine at all times. No part of your ferment should be exposed to air. Once you understand why that matters, the how becomes obvious, and you have more options than you might think.
Why Submersion Is the Core Safety Habit
Fermentation works because beneficial bacteria (mostly lactobacillus species) thrive in the oxygen-free, salty environment beneath the brine. They produce lactic acid, which lowers the pH and makes the jar inhospitable to pathogens. That process is called anaerobic fermentation, and it only works properly without oxygen.
Air exposure breaks the chain. Any vegetable peeking above the brine is sitting in an oxygen-rich zone. That's where mold and kahm yeast grow. Kahm is the white, sometimes wrinkled film that forms on the surface of neglected ferments. It's not dangerous in small amounts, but it signals a problem and can affect flavor. True mold, fuzzy patches in green, black, or pink, is a reason to discard the batch entirely.
Keeping everything submerged removes the oxygen, removes the habitat, and lets the bacteria do their job undisturbed. It's the one habit that separates a successful ferment from a frustrating one.
What Happens Without a Weight
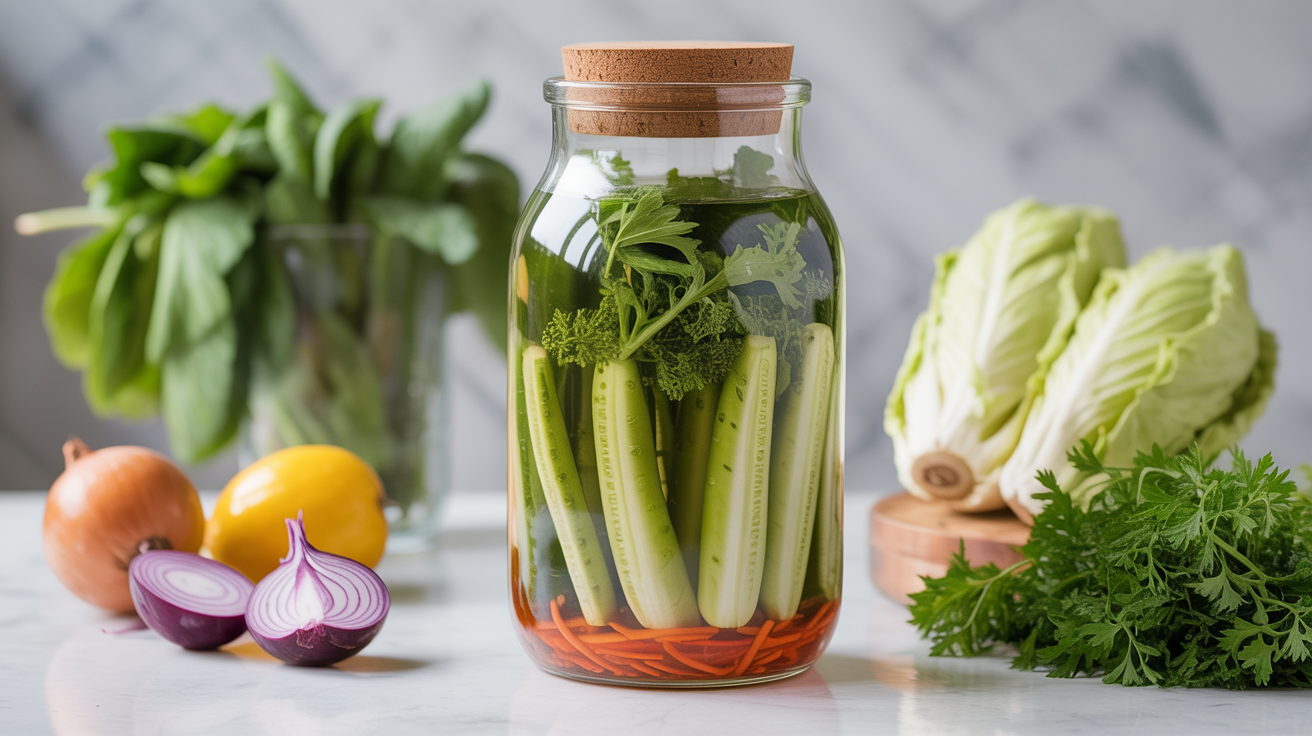
Shredded cabbage for sauerkraut is a good example. You pack it tightly, it releases liquid, and for the first hour it stays down. Then fermentation kicks off, CO₂ bubbles form underneath the cabbage, and the whole mass floats to the surface. Without something holding it down, you'll open the jar a day later to find exposed cabbage, a cloudy brine, and the beginning of kahm on the surface.
The same thing happens with cucumber spears, carrot sticks, and peppers. Anything with trapped air or irregular shape will eventually float unless held in place.
The Main Methods for Keeping Ferments Submerged
Here is a comparison of the most common approaches:
| Method | How it works | Approximate cost |
|---|---|---|
| Glass fermentation weight | A disc of glass that sits inside the jar opening and presses everything down | $8–15 for a pack |
| Ceramic weight | Similar to glass; often comes with purpose-built fermentation crocks | $0 if included with a crock; $10–20 separately |
| Small jar filled with brine | A baby food jar or jelly jar filled with water or brine; sits inside the mouth of the larger jar | Free |
| Zip-lock bag filled with brine | A bag partially filled with 2–3% brine, sealed and pressed into the jar opening | Free |
| Cabbage-leaf cap | An outer cabbage leaf folded and tucked over shredded vegetables to create a barrier | Free |
| Folded outer leaf | Works for any large-leafed vegetable; same principle as the cabbage leaf | Free |
None of these methods is universally best. The right choice depends on your jar, your vegetables, and what you have on hand.
Glass and Ceramic Weights
Dedicated fermentation weights are the tidiest solution. They're designed to fit inside wide-mouth mason jars and sit flush against the jar walls so nothing slips past them. Glass weights are easy to clean, don't absorb odors, and last indefinitely.
The main limitation: they work best with uniformly shredded or sliced vegetables. A whole garlic clove or a chunky pepper strip can still sneak around the edges. In that case, you might layer a cabbage leaf on top of the weight to catch any stragglers.
The Brine-Filled Bag
Fill a small zip-lock bag about halfway with a 2–3% salt brine (roughly 1 teaspoon of non-iodized salt per cup of water), press out the excess air, and seal it. Lay the bag flat over the vegetables and press it into the jar mouth so it fills the headspace and pushes everything down.
This method works well for oddly shaped cuts because the bag conforms to whatever is underneath it. It also acts as an airlock of sorts, if you use brine in the bag rather than plain water, a small leak won't dilute your ferment. The downside is that bags can be fiddly to remove, and some people prefer not to use plastic in a fermentation context.
A Small Jar as a Weight
A 4-ounce jelly jar or baby food jar filled with brine and inverted into the opening of a wide-mouth quart jar can press vegetables down effectively. It doesn't create a perfect seal, but for fermented pickles or sauerkraut it's often enough.
You'll need a rubber band or a loose lid to hold it in place. This approach is ideal if you ferment occasionally and don't want to buy equipment.
Cabbage-Leaf and Outer-Leaf Caps
For shredded ferments, this is the most elegant free option. Take one of the large outer leaves from your cabbage, fold it to roughly the diameter of your jar, and tuck it tightly over the shredded vegetable mass. It acts as a physical cap, keeping every strand pushed below the brine.
When you're ready to taste or transfer, peel the leaf away and discard it, it will have taken the brunt of any surface activity. Everything underneath should be clean. This works for kimchi too: read through the kimchi guide for how to tuck the outer leaves in before sealing.
DIY and Budget-Friendly Options
You don't need to buy anything to keep ferments submerged. Here are practical alternatives using items already in most kitchens:
A zip-lock bag with brine. Described above, the most flexible free option.
A smooth river rock. Wash it well, boil it for 10 minutes, and let it cool before placing it in the jar. This works well inside a wide-mouth jar or a ceramic crock. Avoid porous stones or anything that might chip.
A small bowl or ramekin. In a large crock or bowl ferment, a small ceramic ramekin placed upside-down over the vegetables can hold them under the brine. Stack something heavy on top if needed.
Folded plastic bag (dry). A folded clean bag pressed against the vegetables in the jar neck creates enough pressure to keep things down, though the brine-filled version is safer in case of leaks.
When Pieces Still Float
Sometimes a chunk escapes even with a weight in place. Tuck it back down immediately. Use a clean fork or your fingers (washed thoroughly). If the piece has been exposed to air for less than a few hours and shows no surface growth, it's fine to press back under. If it's been sitting above the brine for a day or more and has any fuzziness or off color on the exposed surface, remove that piece and discard it.
Check your jar once a day during the first few days of fermentation, that's when CO₂ production is highest and floaters are most likely.
Topping Up with Extra Brine
Brine can evaporate, especially during longer ferments or in warm kitchens. If your liquid level drops below the vegetables, the solution is straightforward: make more brine and add it.
Mix a 2–3% salt brine using non-iodized salt (kosher salt or pickling salt work well; iodized salt can inhibit fermentation). The ratio is about 1 teaspoon of salt per cup of water, or 20–30 grams of salt per liter if you prefer to weigh. Pour enough to cover the vegetables by at least half an inch, then replace your weight.
Don't top up with plain water. That dilutes the salt concentration, which can shift the fermentation balance and affect texture. A correctly salted brine keeps the environment consistent.
Keeping the Lid Situation Right
Most beginner ferments use a regular mason jar lid left loosely placed, or a dedicated airlock lid. Either way, the goal is to let CO₂ escape without letting air in. If you use a regular lid, "burp" the jar daily by briefly opening it to release gas. If you use an airlock, it handles this automatically.
A tight sealed lid without an airlock will eventually build enough pressure to either pop the lid or crack the jar. Loose is correct here.
Frequently Asked Questions
Does every floating piece cause mold?
Not immediately. A piece that surfaces for a few hours in an active, gassy ferment is less dangerous than one that sits above the brine for days. That said, you shouldn't leave floating pieces unattended. The risk increases the longer the surface is exposed to air and the longer the overall ferment runs.
What does kahm yeast look like, and should I throw the batch away?
Kahm is a flat white or cream-colored film that looks almost like a thin sheet of paper on the surface. It's not fuzzy. It can have a slightly yeasty or musty smell but is generally harmless in small amounts. Skim it off with a clean spoon, make sure everything is submerged, and the ferment is usually fine. Mold, fuzzy, colored, and unmistakably three-dimensional, is different. Discard any batch with true mold.
Can I use a regular zip-lock bag with plain water instead of brine?
Yes, but brine is preferable. If the bag leaks, water will dilute your ferment and lower the salt concentration. A small amount of salt in the bag water means any leak is roughly salt-neutral. Fill the bag with the same brine concentration you're using in the jar.
How much brine should cover the vegetables?
Aim for at least half an inch of brine above the highest piece of vegetable. An inch is better for longer ferments. More headspace above the brine (between the liquid and the lid) is fine, you just don't want vegetables near the surface.
My brine went cloudy. Is that a problem?
Cloudy brine is a good sign. It means the lactobacillus bacteria are active and multiplying. Clear brine at the start turning cloudy over two to three days is exactly what you want to see. The cloudiness settles out over time and is harmless to eat.